
Practical technical guidance
Commercial Fan Installation Guide
Help your fan deliver its stated airflow, pressure and noise performance. Use these practical checks when installing axial, centrifugal and roof-mounted fans, attenuators and vibration-control components.
View the illustrated dos and don’ts →
Before installation✓ Confirm airflow direction and duty✓ Keep fan inlets and outlets clear✓ Check product-specific instructions✓ Plan safe access for maintenance
Six rules that prevent most performance problems
Poor airflow into or away from a fan can reduce performance and increase noise even when the fan itself is correctly selected.
Keep the inlet clearAvoid bends, dampers and obstructions immediately before the fan.
Keep the outlet clearAllow straight duct or clearance before walls, bends and fittings.
Use gradual transitionsKeep transitions symmetrical and, where possible, to an included angle of 15° or less.
Keep connectors tautSlack flexible connectors reduce the effective duct area and cause turbulence.
Allow air to settleSeparate fans and attenuators from dampers, bends and other disturbances.
Control vibrationUse suitable mounts and flexible connections without creating rigid bridges.
Installation guidance by fan and system type
Open each section for concise do-and-avoid guidance.
Axial fans: inlet, outlet and transitions
- Fit a correctly sized inlet cone to a free-air axial fan intake.
- Allow at least one fan diameter between an open inlet or outlet and a nearby obstruction.
- Use turning vanes where a sharp bend cannot be moved away from the fan.
- Keep flexible connectors taut, aligned and preferably remote from the fan.
- Avoid abrupt inlet expansion; use a gradual transition of 15° or less where practical.
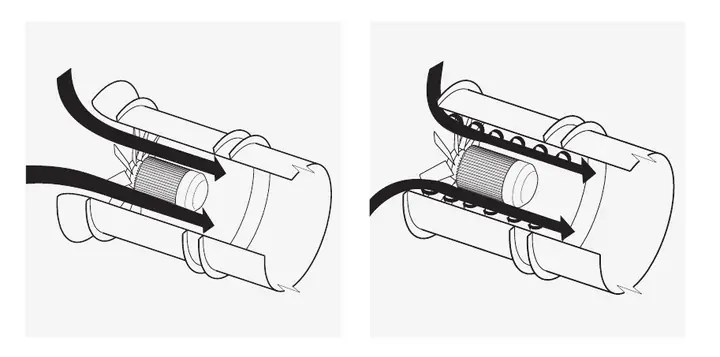
DO: smooth, clear airflowAVOID: nearby obstruction
Centrifugal fans: bends and inlet flow
- Where a discharge bend is close to the fan, orient it in the direction of wheel rotation.
- Use radiused bends and splitters to reduce pressure loss.
- Size inlet boxes generously and use turning vanes or splitters to prevent spinning airflow.
- Maintain even airflow across the whole inlet. Eccentric flow can significantly reduce output and raise noise.
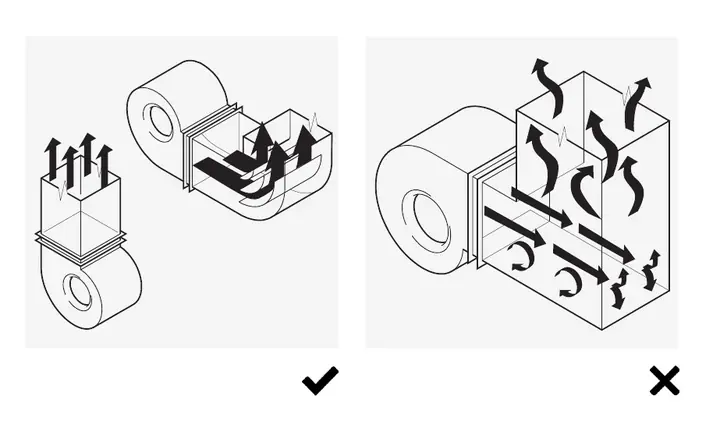
DO: follow wheel rotationAVOID: opposing discharge bend
Roof fans: seals, angles and prevailing wind
- Make the seal between the upstand and fan base airtight to prevent short-circuiting.
- Keep the fan base level or within the product's permitted mounting angle; as a general guide, do not exceed 30° unless instructions state otherwise.
- Position roof units to minimise the effect of prevailing wind and back pressure.
- Align gravity shutters so each leaf experiences the same gravitational effect.
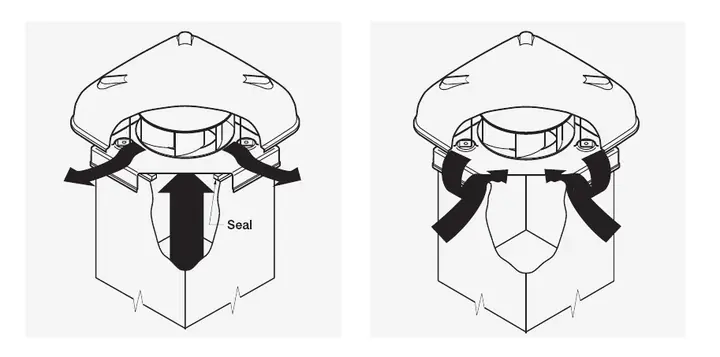
DO: seal the full perimeterAVOID: air short-circuiting
Noise control and attenuator positioning
- Use gradual, symmetrical transitions near attenuators.
- Provide a settling length between volume-control dampers and attenuators.
- Keep bends and other turbulent fittings away from attenuator faces where possible.
- When an attenuator follows a bend, align the splitters with the plane of the bend and use turning vanes where required.
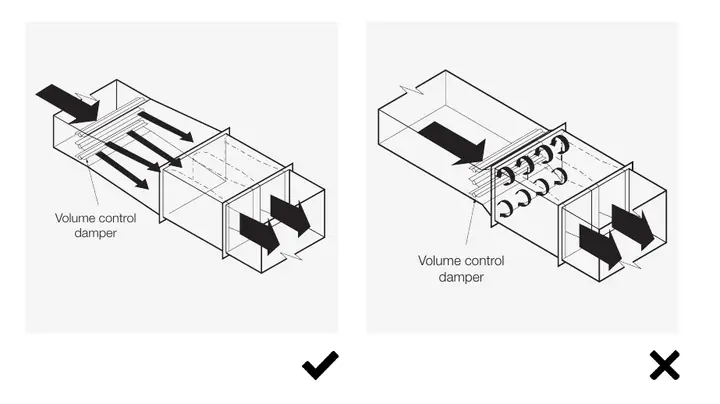
DO: let airflow settleAVOID: damper at attenuator face
Vibration isolation and flexible connections
- Select isolators for the fan weight, operating speed and support arrangement.
- Use flexible connectors on inlet and outlet connections where vibration transfer is a concern.
- Do not bridge the isolators with rigid ductwork, conduit or supports.
- After alignment, check that connectors are taut without placing strain on the fan casing.
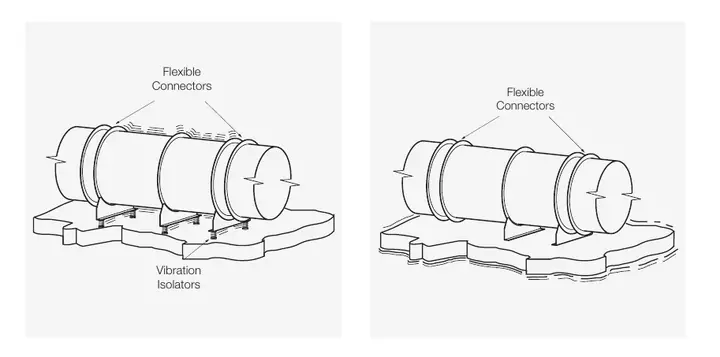
DO: isolate fan and ductAVOID: rigid vibration path
Final installation checks
- Confirm the fan rotates in the correct direction and the system airflow direction is correct.
- Check all guards, access panels, fasteners, supports and electrical isolators.
- Remove installation debris and ensure the impeller turns freely before energising.
- Commission the completed system and compare measured airflow, pressure and current with design and product data.
- Record settings and leave safe access for inspection, cleaning and future service.
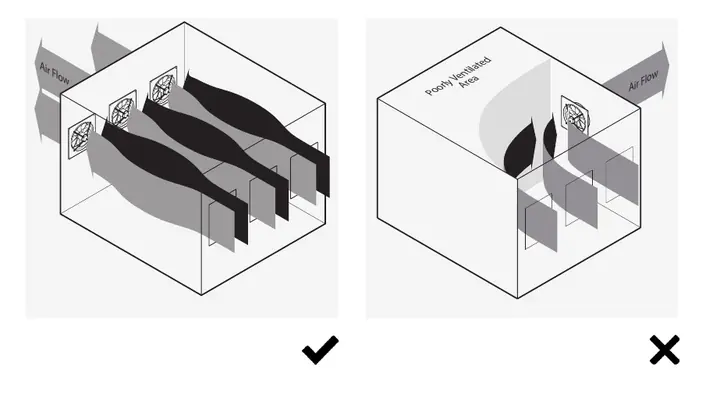
Commission before handoverKeep a record of results
Useful product ranges
Choose the fan and supporting components as a complete system.
Important: This page provides general installation guidance and does not replace the installation and maintenance instructions supplied for the selected product. Follow the project specification and applicable regulations. Electrical work must be carried out by a suitably qualified person.
Unsure about fan selection or installation?
Send us the duty, system layout and any space constraints and our team will help you choose compatible components.